How To Build A Compost Tumbler
Any gardener will tell you a garden is only as good as the soil it is grown in, and the best to improve your soil is with rich organic compost. Any gardener will also tell you that you can never have too much compost! That lack of enough compost was our problem when the growing season began this year. We already had two tumblers but realized it was time to add a third tumbler to our setup. We switched from a three-bin wired frame about two years ago, and our compost has never been richer or decomposed as fast! The main reason is that the tumblers make mixing effortless—no more shoveling or turning with a pitchfork.
SUPPLIES:
Basic Tools: Saw, jigsaw, drill, hammer, screwdriver, and tape measure
- Wood: 2 37″ 1 x 2 x 4
- 2 15″ 1 x 2 x 6
- Washers
- 2 hinges
- 2 sliding locks
- 4 wheels
- 4 corner brackets
- PVC pipe about 4′ shorter than the barrel
- Small square of mesh about the size of your lid
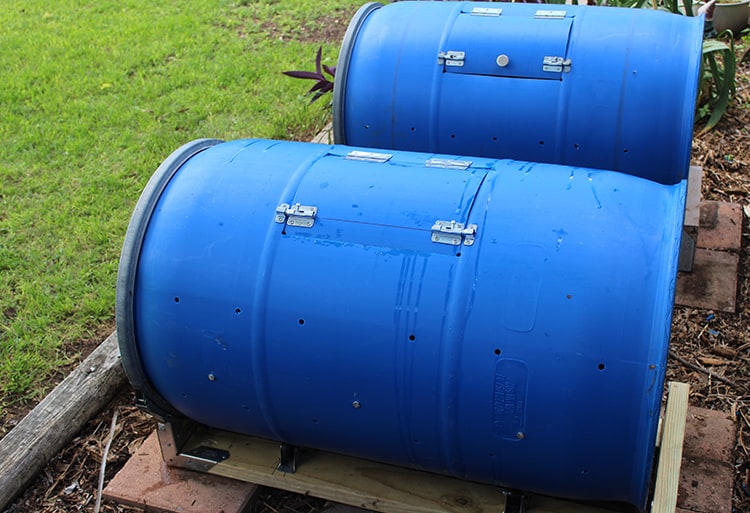
All supplies can be purchased at Home Depot except for the barrel. We wanted food-grade plastic that had never been used to hold chemicals. We were able to purchase it at a local feed store. I know some people use old oil barrels or chemical barrels; we didn’t want to chance anything leaching from the plastic into our compost.
BUILDING THE BASE
- Cut your wood into the following measurements: 2 37″ 1 x 2 x 4
- 2. 15″ 1 x 2 x 6
- Nail the 15″ boards on the outside ends of the 37″ boards to form a rectangle.
- Nail or screw your brackets at the corners to reinforce your base.
- Attach the wheels to the base
THE BARREL
- Measure and mark where you want your hatch/door. We made our 8.5″
- Mark where the hardware is going to go. This includes the hinges and locks
- Cut out the hatch. It is easier to start if you drill a starter hole for the jigsaw.
- Cut the PVC to the desired length and then cut it in half.
- Mount the PVC to the inside of the barrel
- Attach your hardware and mount the hatch/door.
- Cut a hold in the lid and mount the wire mesh. This is what provides the main flow.
- Drill several lines of holes along the barrel for additional venting and drainage. Don’t worry; your compost won’t leak out.
- Wash out your barrel and attach your lid.
- Begin adding organic material.
We have a longer video with more details and no ads in our projects section. How to Build a Compost Tumbler
Not sure what to add? Don’t worry I have an older post to help you out: Free Food For Your Garden.